
Scheduling a shipment helps you to make necessary arrangements for shipping some assets from your organization to your contacts or even to your organization's another location. If the assets are shipped between your own organization's locations, it is termed as an internal shipment.
To schedule a shipment, click on Schedule Shipment in the side menu under Shipment tab. The navigation path is Shipment-> Schedule Shipment
Clicking on Schedule Shipment will take you to a screen where you can select the assets you intent to ship.
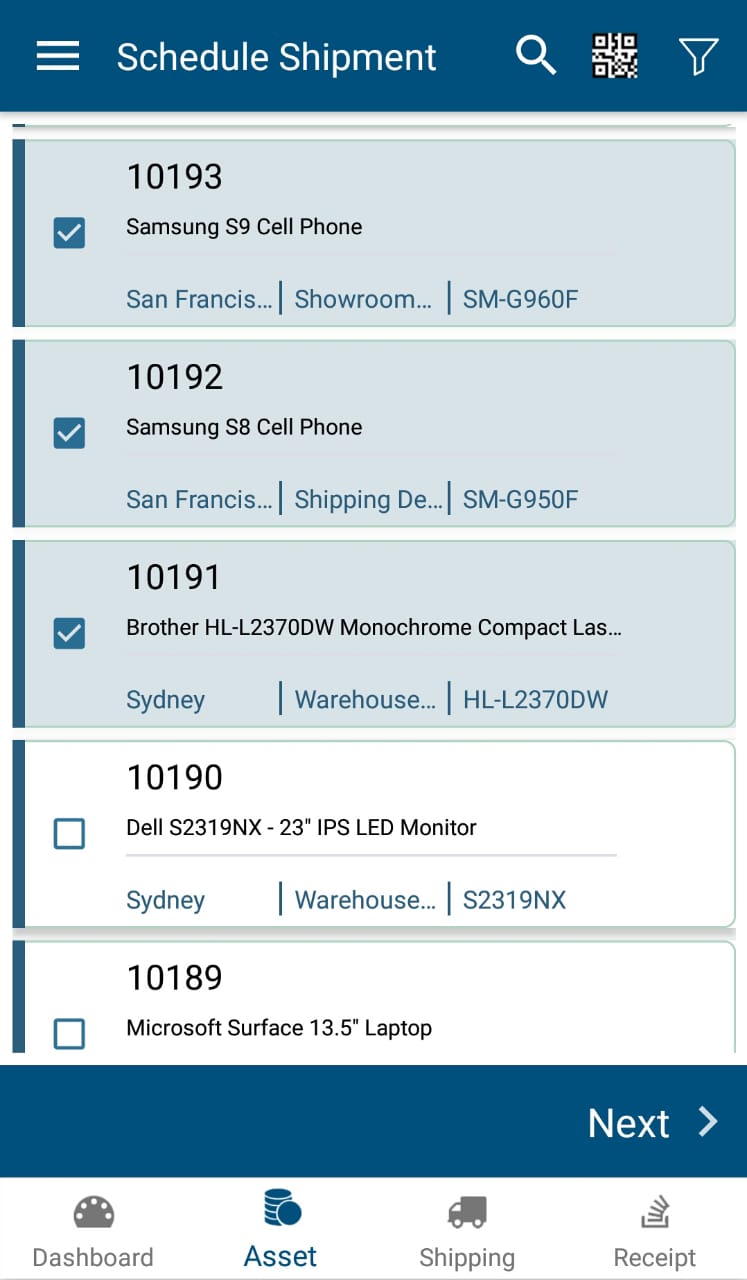
After selecting the assets by clicking the check box near the asset tag , click on ' Next ' on the bottom right corner to navigate to a screen named 'Confirm Asset List'.
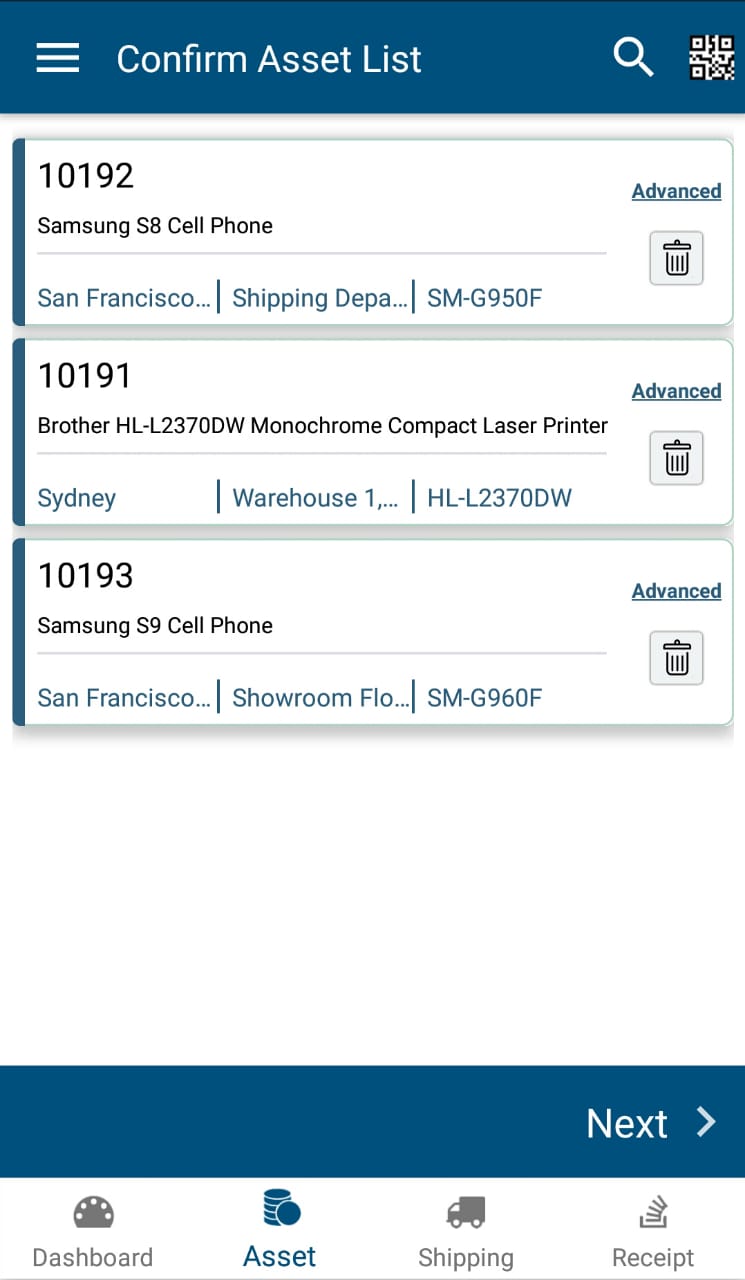
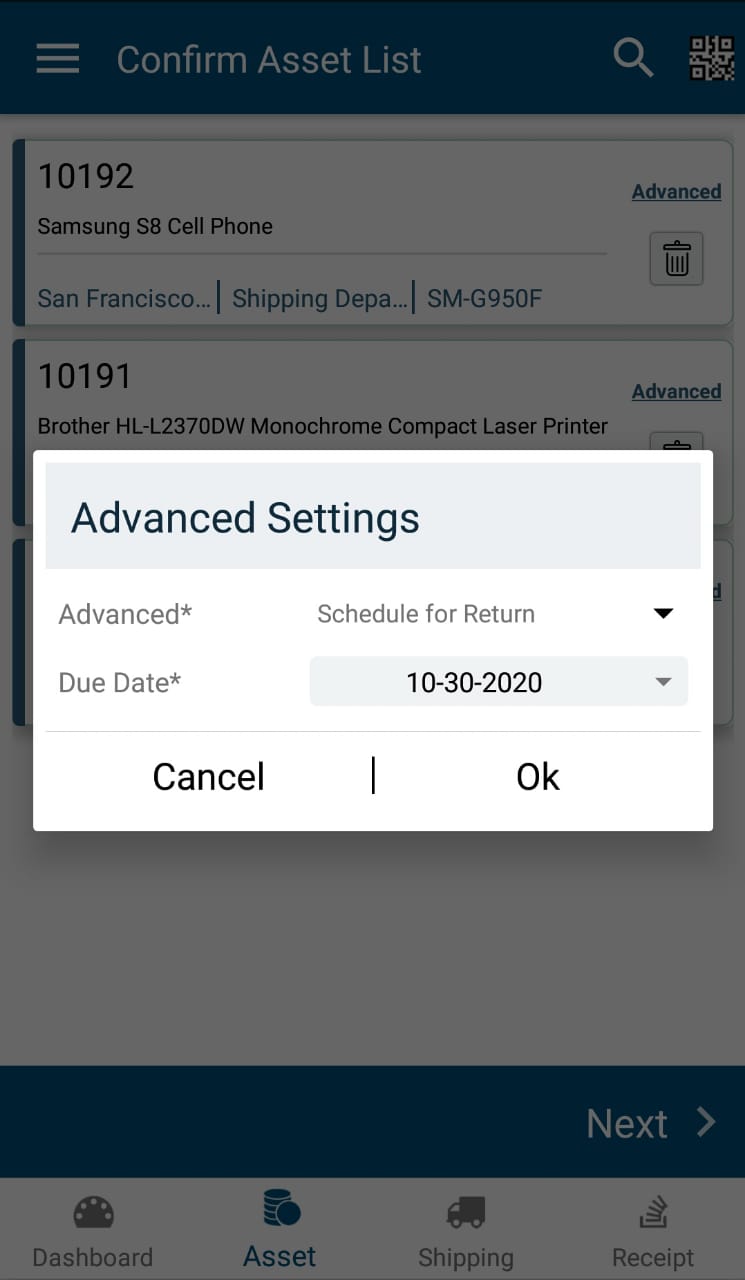
You can schedule a return or exchange by clicking on Advanced. From the Advanced Setting dialog box, choose Schedule for Return, or Schedule for Exchange.
While selecting the option Schedule for Return, current date will be automatically available in the field, Due Date. But you can select the date you want.
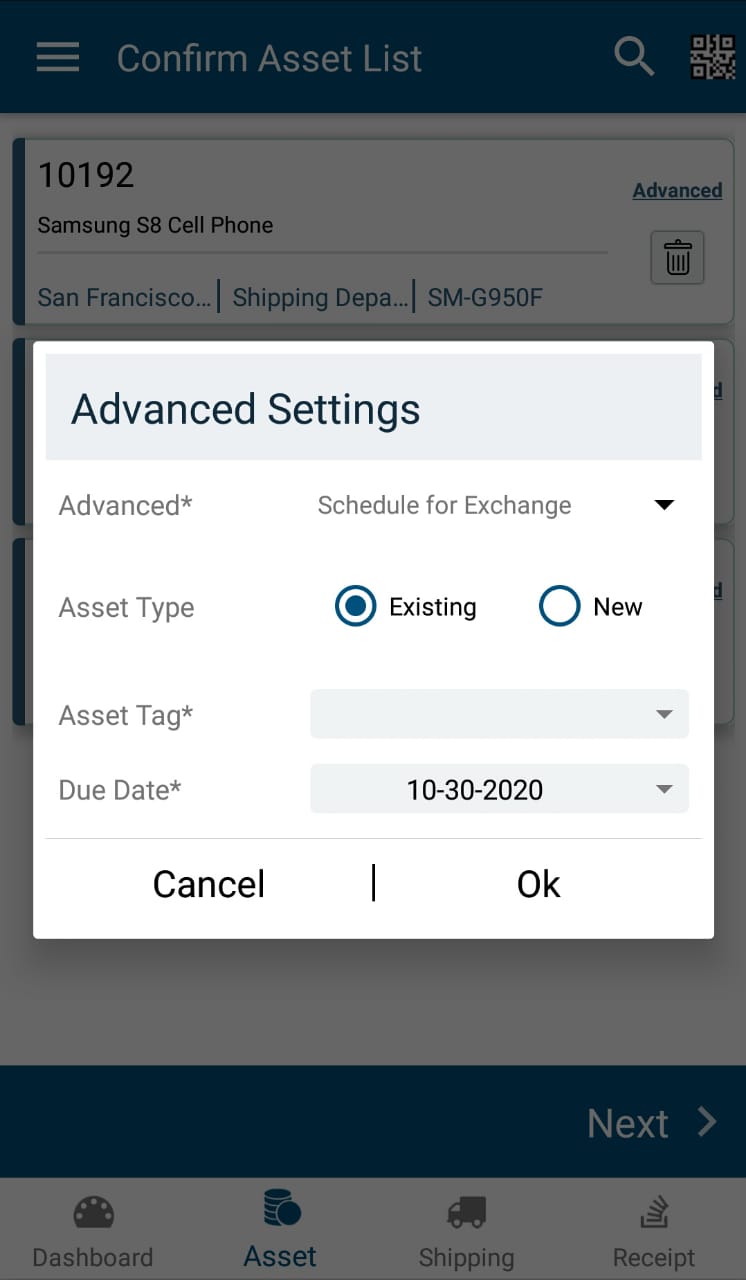
While selecting the option Schedule for Exchange, select Asset Type, Asset Tag and enter the Due Date. Asset type can be Existing or New. For Due Date, current date will be automatically available but you can select the date you want.
As the next step click on the Next option in the bottom right of the screen. This will take you to a screen where the other details are to be entered.
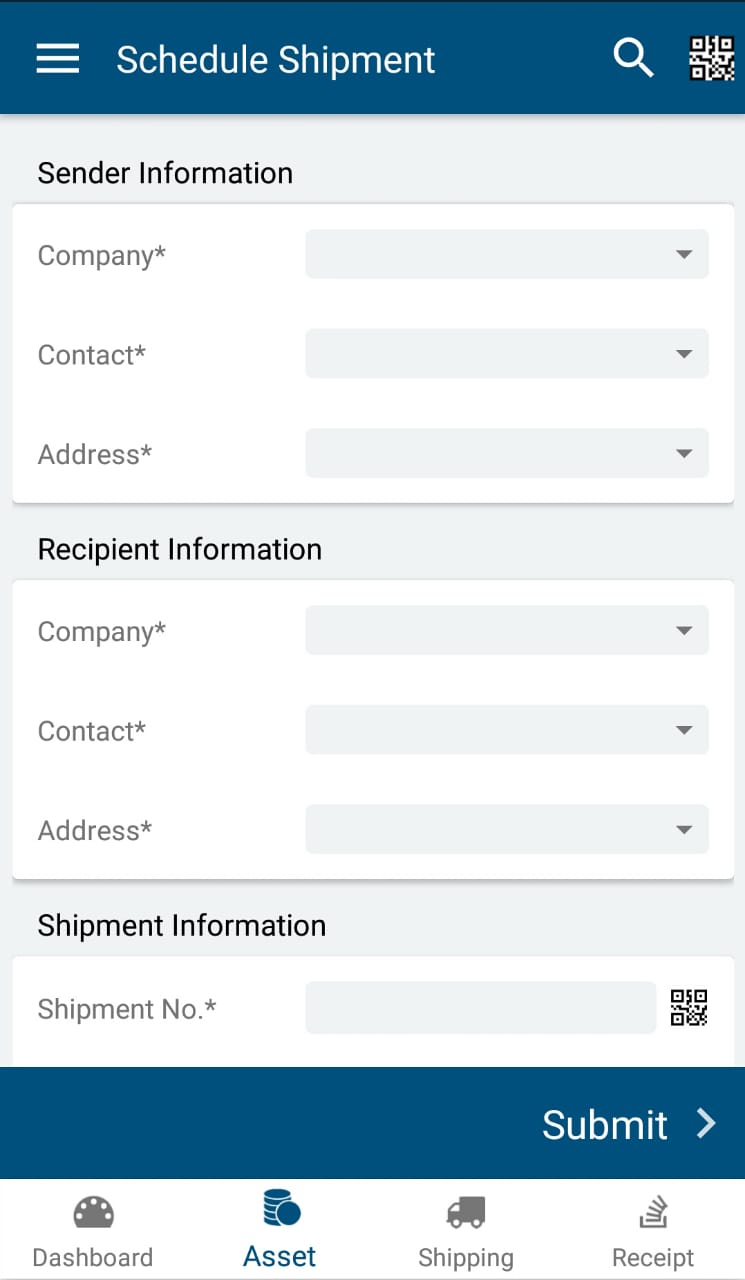
- Sender Information - Company, Contact and Address are required fields. These can be set up as a default set of information to save time, by configuring General Settings in the web application.
- Recipient Information - Company, Contact, and Address are required fields. These can be set up as a default set of information to save time, by configuring General Settings in the web application.
- Shipment No* - If an admin set the Shipping Number option to Custom Shipping Number, a required field for shipping number will also show in this section. Otherwise, Tracmor assigns a sequential number.
- Choose a shipping courier from the drop down menu. If you need to add a shipping courier in web application, refer this link: Adding a courier
- Adding the tracking number the courier provides is optional.
- Adding a Note is optional.
- If you click on yes for Email Notification, add one or more email address(es).
- The Other Information section only appears if you have added custom fields are defined in the shipment section. If they are marked as mandatory fields, an asterisk will be attached to the field name. For more information, see What do I need to know about custom fields?
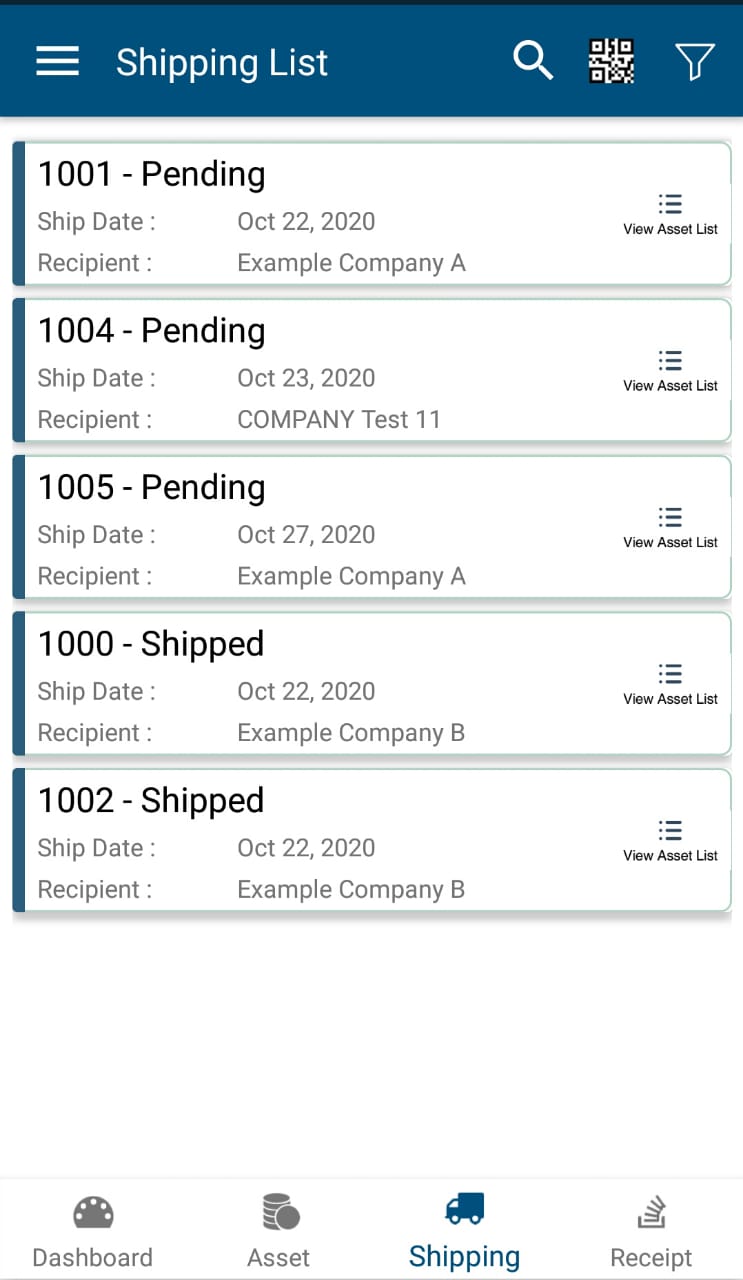
Click on Submit and you will see the message " Shipment is added successfully " and new shipment will be available in the Shipment List.
0 Comments