
With custom fields you can expand Tracmor to fit your organization's tracking needs — across all modules — and down to the last detail.
Note: Only users with Admin permissions can create custom fields; if you do not see the menus shown below, contact your Tracmor account owner admin to request admin permissions for your role.
This article covers:
- Finding the menu options
- Adding a custom field
- Editing a custom field
- Managing the field list
- Related articles
Finding the menu options
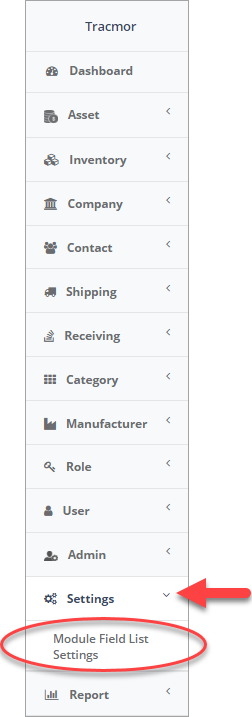
To access settings for custom fields, navigate to Settings>Module Field List Settings:
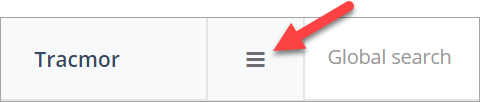
Note: If the side menu is not visible, click on the square to the left of Global Search at the top of the screen. Clicking on this icon allows you to show and hide the side menu.
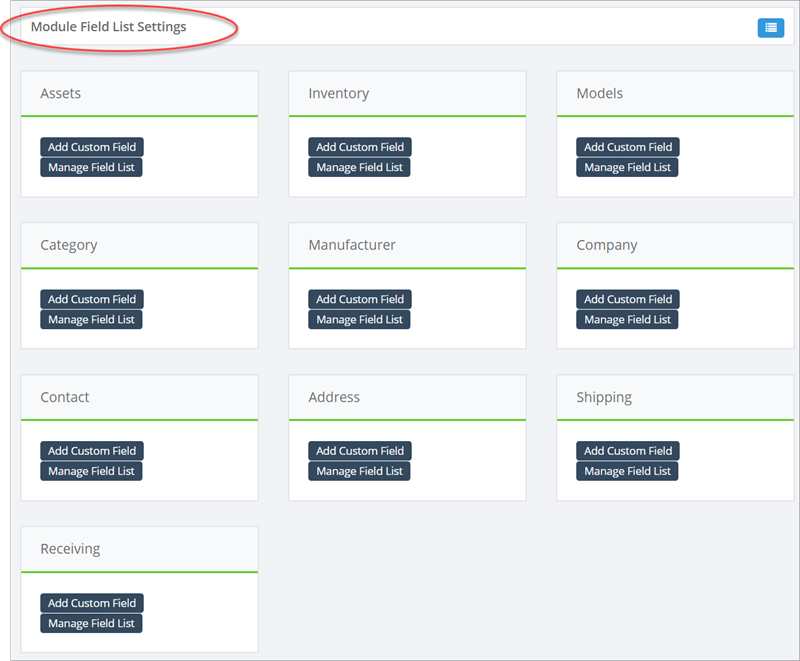
Clicking on Module Field List Settings provides access to the custom field options for all 10 modules:
Adding a custom field
The process for adding a custom field is the same in all modules and involves two main steps: formatting the custom field and setting the permissions to view and edit.
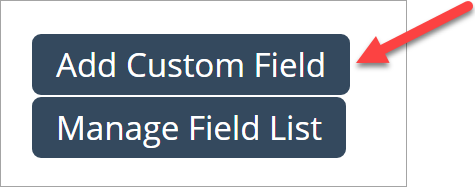
1. Navigate to Settings>Module Field List Settings Click on Add Custom Field.
Note: You can also create a new custom field by navigating to Admin>Custom Field List and clicking on the (blue) plus icon in the upper right corner.
2. Provide a Field Name (required) — a short but descriptive name is best.
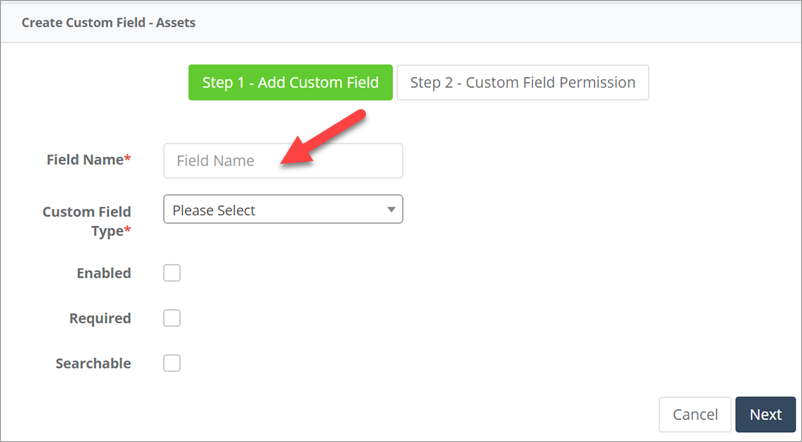
3. Select the Custom Field Type (required). The options are:
- Date Time. Allows entry of a date and time in this format: Month-Day-Year and time (24-hour clock)
- Dropdown List. Creates a list of options that users can choose from.
- Text. Creates a field for simple information such as color or VIN number for a vehicle.
- Textarea. Creates a field for longer text.
- Url. Creates a field for a web link.

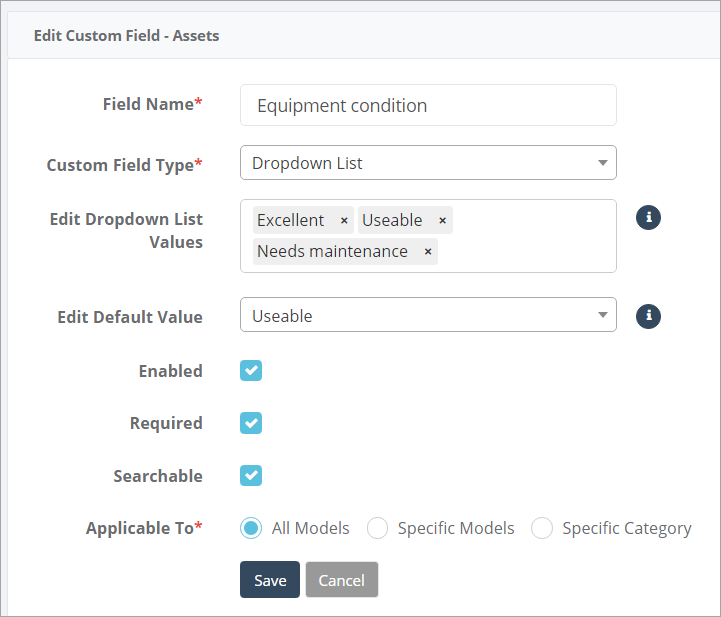
Example for Dropdown List: Let's say you would like to add a required field for "Equipment condition" (enter this as the new Field Name), and the values you want to make available to select from are "Excellent," "Good," and "Requires maintenance" (enter these under Add Dropdown List Values after selecting "Dropdown List" for the Custom Field Type). If a default value applies, enter it in the Select Default Value field.
Note: If you will be importing custom field values, the values created here (or added through the editing process) are the only ones that you can import.
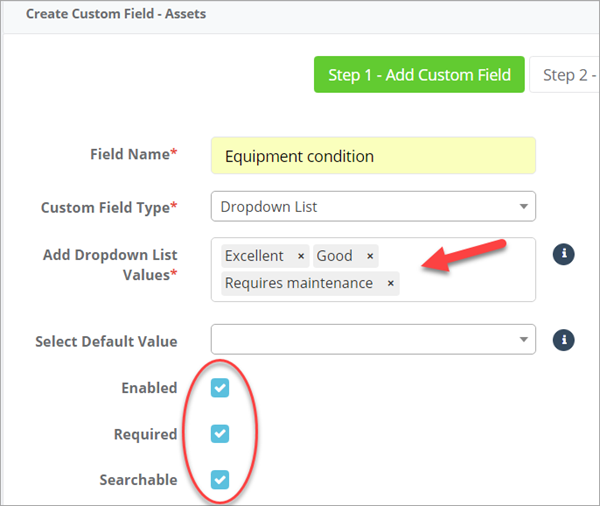
4. Once all required information is entered, your next three options are circled in red in the previous screenshot and described below:
- Click the check box next to Enabled to allow the field to be visible.
- Make the new field required by clicking in the check box next to Required.
- Make your custom field Searchable by clicking that check box.
5. Click Next in the bottom right corner to arrive at the second step, where you set permissions for who can view and edit the new custom field.
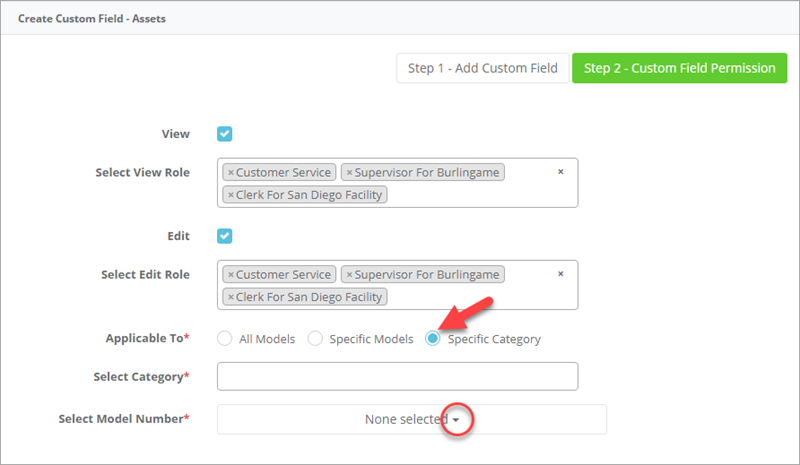
The default shows all roles that are already created, and the check boxes are "checked" to enable all. (If needed, add more roles and then assign them to users.)
You can limit permissions as follows:
- View. Click on the "x" next to roles to be omitted.
- Edit. Click on the "x" next to roles to be omitted.
- Applicable to. Options depend on the module the new field is being created in. Within the Assets module (this example) you can limit the field to "All Models," "Specific Models," or "Specific Category." When you click on Specific Models or Specific Category you can select from a dropdown menu that shows the available items (circled in red).
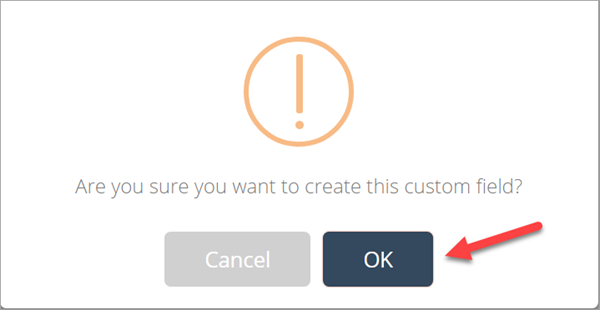
6. Click on Save. To activate the new custom field, click on OK.
Editing a custom field
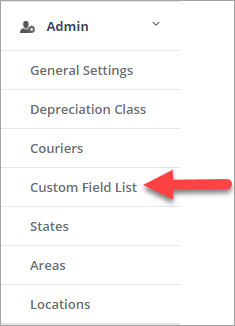
To edit a custom field, navigate to Admin>Custom Field List.
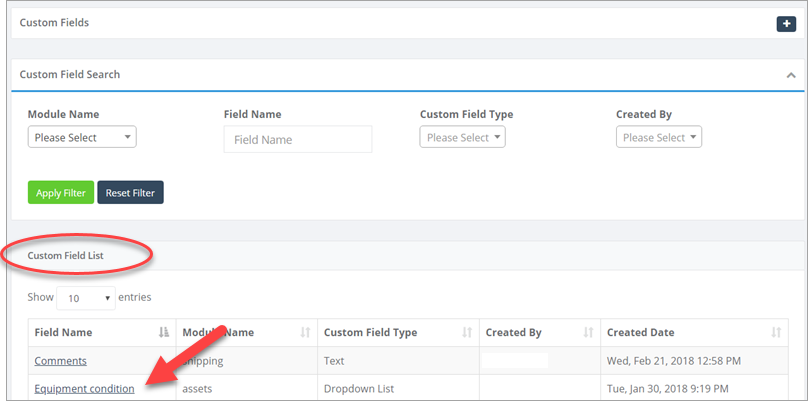
If you need to search for a custom field, you can filter by Module Name, Field Name, Custom Field Type, and Created By. Create a filtered list by choosing search parameters and clicking on Apply Filter to narrow the list according to your criteria.

Note: You can add a new field by clicking on the (blue) plus icon in the upper right corner.
To edit a Field, first click on the Field Name of interest; all Field Names are a link.
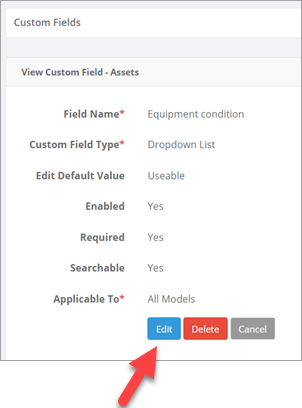
The dialog box provides three options: Edit, Delete, and Cancel.
To edit the custom field, click on Edit:
The next dialog box is takes you back to the same options you had when you created the custom field. Once you have made your changes, click on Save.
Managing the field list
Tracmor's default list view includes mostly built-in and required fields. You can change the items that show in the list view for all 10 modules.
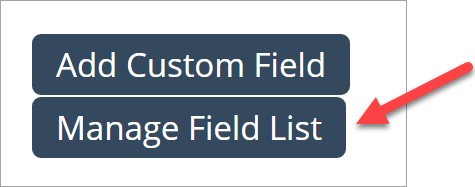
To change which fields display, navigate to Settings>Module Field List Settings and click on Manage Field List.
The Field List for each module displays primarily built-in fields. When you create and enable custom fields, the new custom field automatically becomes available, but if you want the new field to also appear in the List View for that module, simply drag the box with that label from the "Available Items" column to the "Selected Items" column, as shown by the arrow below.
Once the box is in the Selected Items column, click Save, then click OK on the confirmation message.
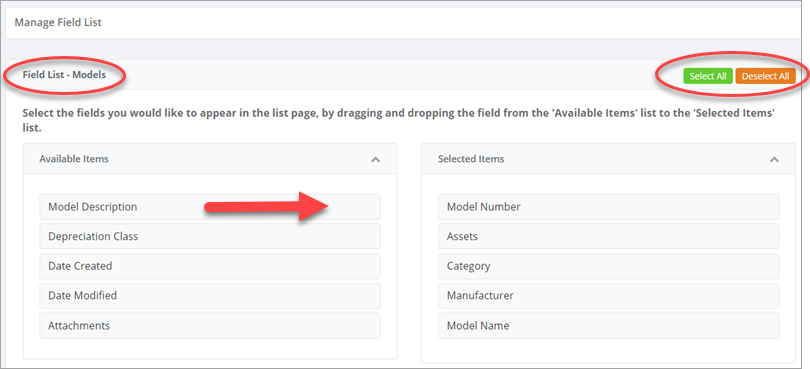
Shortcut: If you want all Available Items to become Selected Items, click on Select All in the upper right corner. If you want to start over, so to speak, you can click on Deselect All and then drag only the fields you want to display into the Selected Items column.
Related articles
Building the Foundation Quickly - Import Overview
What do I need to know about assets?
What do I need to know about roles?
What do I need to know about users?
0 Comments